
1. Turn on DigitAize, start the App
- Shortly press the button next to the USB port on the fingerboard of your Instrument. A LED starts blinking green.
- Plug the DigitAize USB Hub to your computer.
- Start the DigitaizeConnect App (you will find it as a shortcut on your desktop, or under the following paths:
Windows: c:/Program Files/Nimikry Music/DigitaizeConnect/DigitaizeConnect.exe
Mac: /Applications/DigitaizeConnect.app

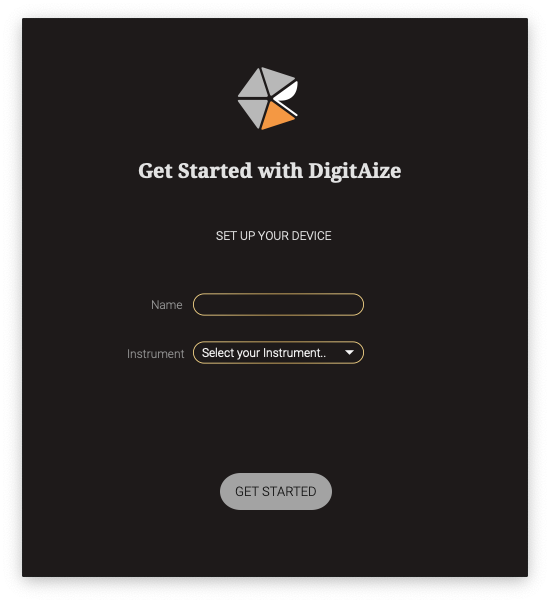
2. Register Device
After your instrument is connected, a pop-up window will appear automatically.
- Choose a name for your instrument.
- Select the instrument type.
- Click on the GET STARTED button
3. Firmware Update
After you registered your instrument you might be prompted to update the firmware on your device. Do not ignore this step, as only having the most recent firmware version guarantees the best experience with the DigitAize system.
Read more about the firmware update steps.
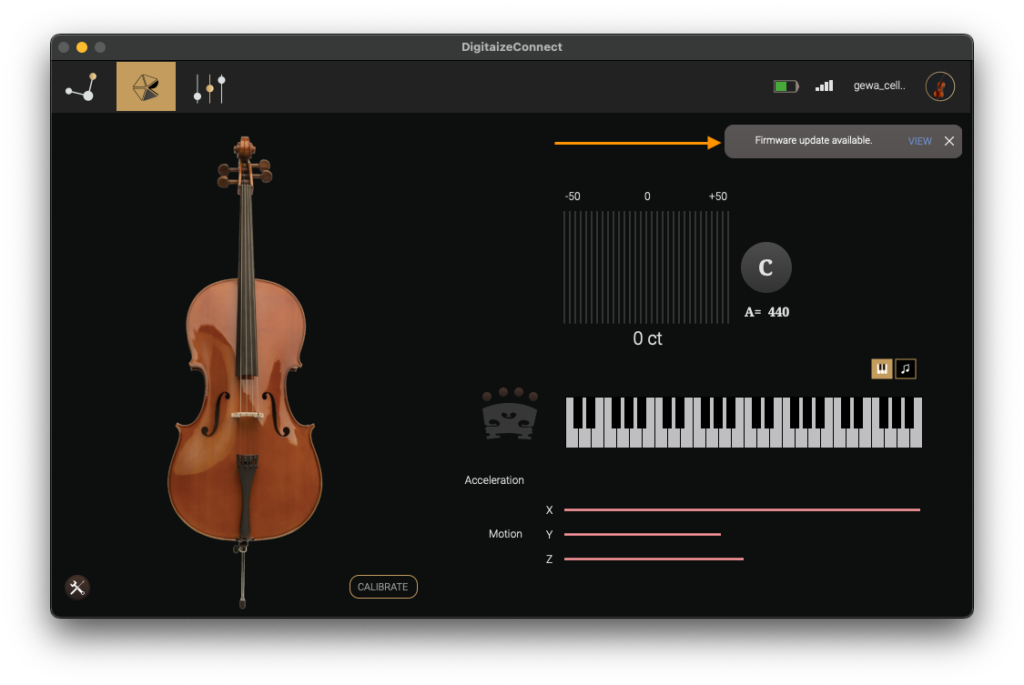
4. Calibration
The calibration is needed to map the sensor fingerboard to your specific instrument. It is done by correlating the data acquired from the sensor to the resulting pitch. It is a sort of tuning of the digital system.
Read more about the calibration.
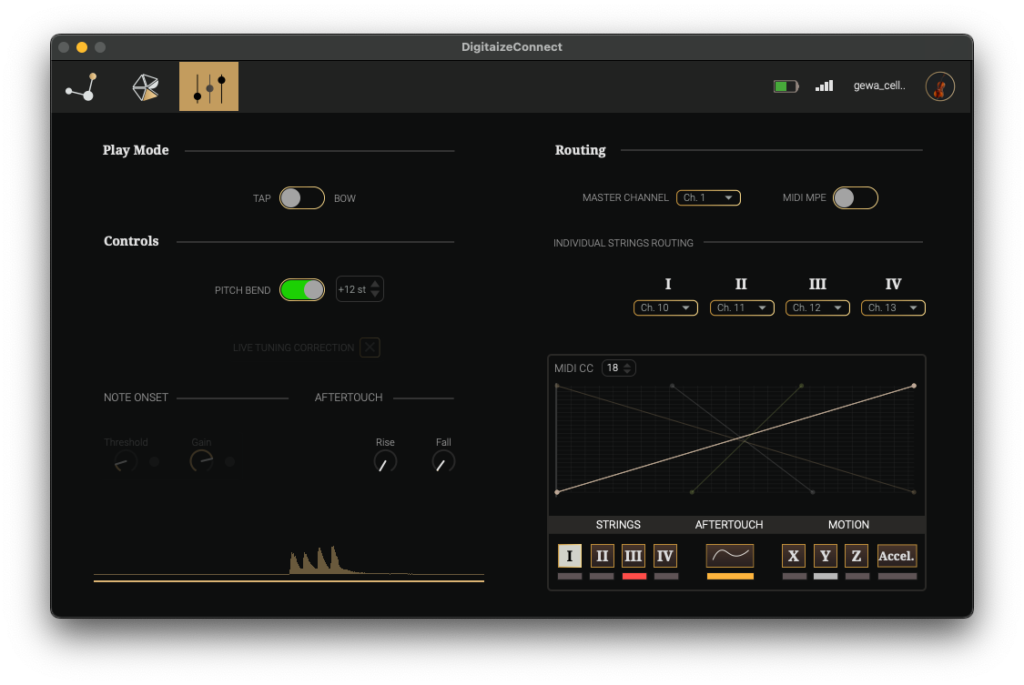
5. Configure MIDI
In the Setting Section of the app you can choose the midi routing of the individual strings, set up the sensitivity of the capturing system as well as choose between the Tap/Bow modes. From now on your instrument is available as a Virtual Midi Port and can be accessed from any DAW. NOTE: keep the DigitaizeConnect app open while playing to maintain the connection.
Read more about the Midi features.
6. Enjoy playing with DigitAize!
You’re ready to start using your instrument.
Additional resources: